Quickstart
Note
You have the option to use a managed storage with the SDK, but it only supports up to 10,000 vector variables. If you need to run bigger problems, use the AWS S3 bucket option that supports up to 100,000 variables.
Example with managed storage
The following code is a quick and a simple example using TitanQ SDK.
Note at the highlighted line, Model is created without a storage_client.
 1import numpy as np
 2from titanq import Model, Vtype, Target, S3Storage
 3
 4TITANQ_API_KEY="<insert your TitanQ API key here>"
 5
 6# Problem construction
 7edges = {0:[4,5,6,7], 1:[4,5,6,7], 2:[4,5,6,7], 3:[4,5,6,7], 4:[0,1,2,3], 5:[0,1,2,3], 6:[0,1,2,3], 7:[0,1,2,3]}
 8size = len(edges)
 9
10# construct the weight matrix from the edges list
11weights = np.zeros((size, size), dtype=np.float32)
12for root, connections in edges.items():
13    for c in connections:
14        weights[root][c] = 1
15
16# construct the bias vector (Uniform weighting across all nodes)
17bias = np.asarray([0]*size, dtype=np.float32)
18
19# TitanQ SDK
20model = Model(api_key=TITANQ_API_KEY)
21model.add_variable_vector('x', size, Vtype.BINARY)
22model.set_objective_matrices(weights, bias, Target.MINIMIZE)
23response = model.optimize(timeout_in_secs=1, coupling_mult=0.75, num_engines=2)
24
25print("-" * 15, "+", "-" * 26, sep="")
26print("Ising energy   | Result vector")
27print("-" * 15, "+", "-" * 26, sep="")
28for ising_energy, result_vector in response.result_items():
29    print(f"{ising_energy: <14f} | {result_vector}")
Example using AWS S3 Buckets
The following section is for developers wishing to use the TitanQ with S3 buckets.
1. Create Bucket
To use the Python SDK, we only need to create a single bucket.
Start by going to the S3 management console
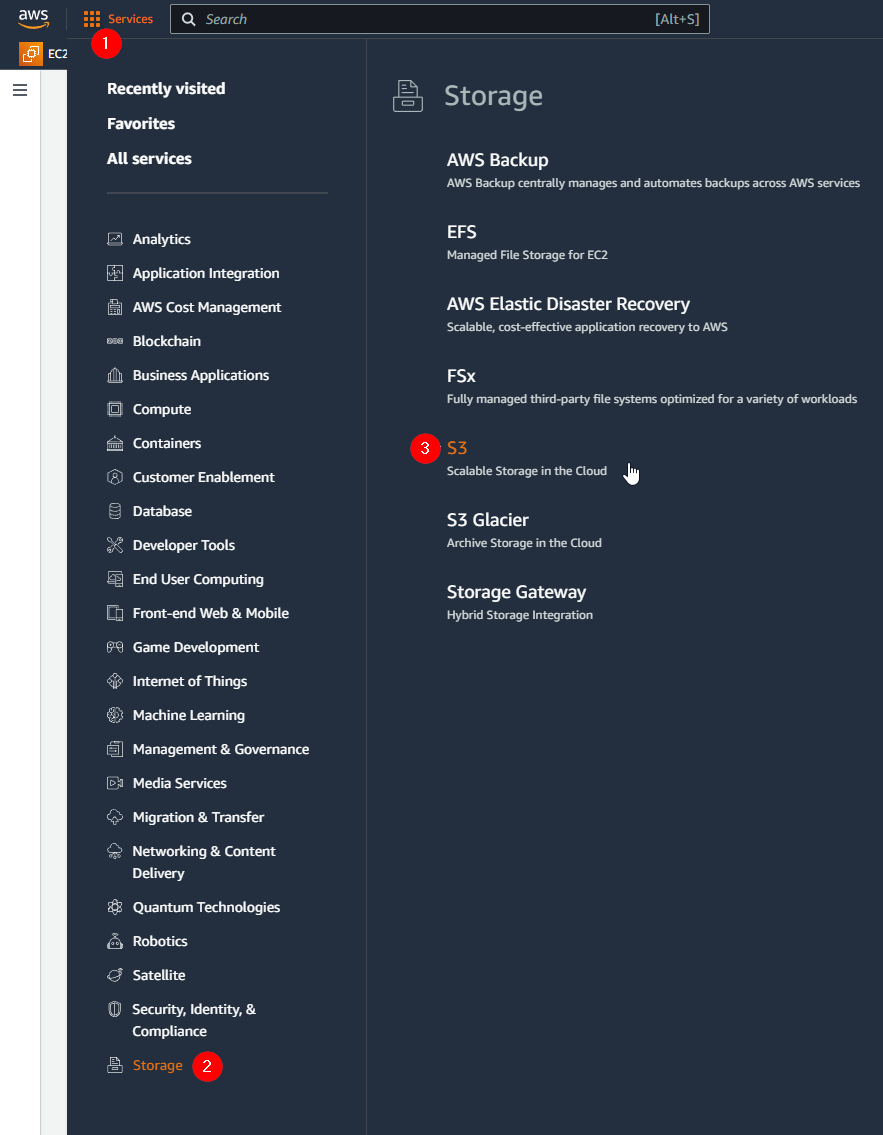
Select Create Bucket.

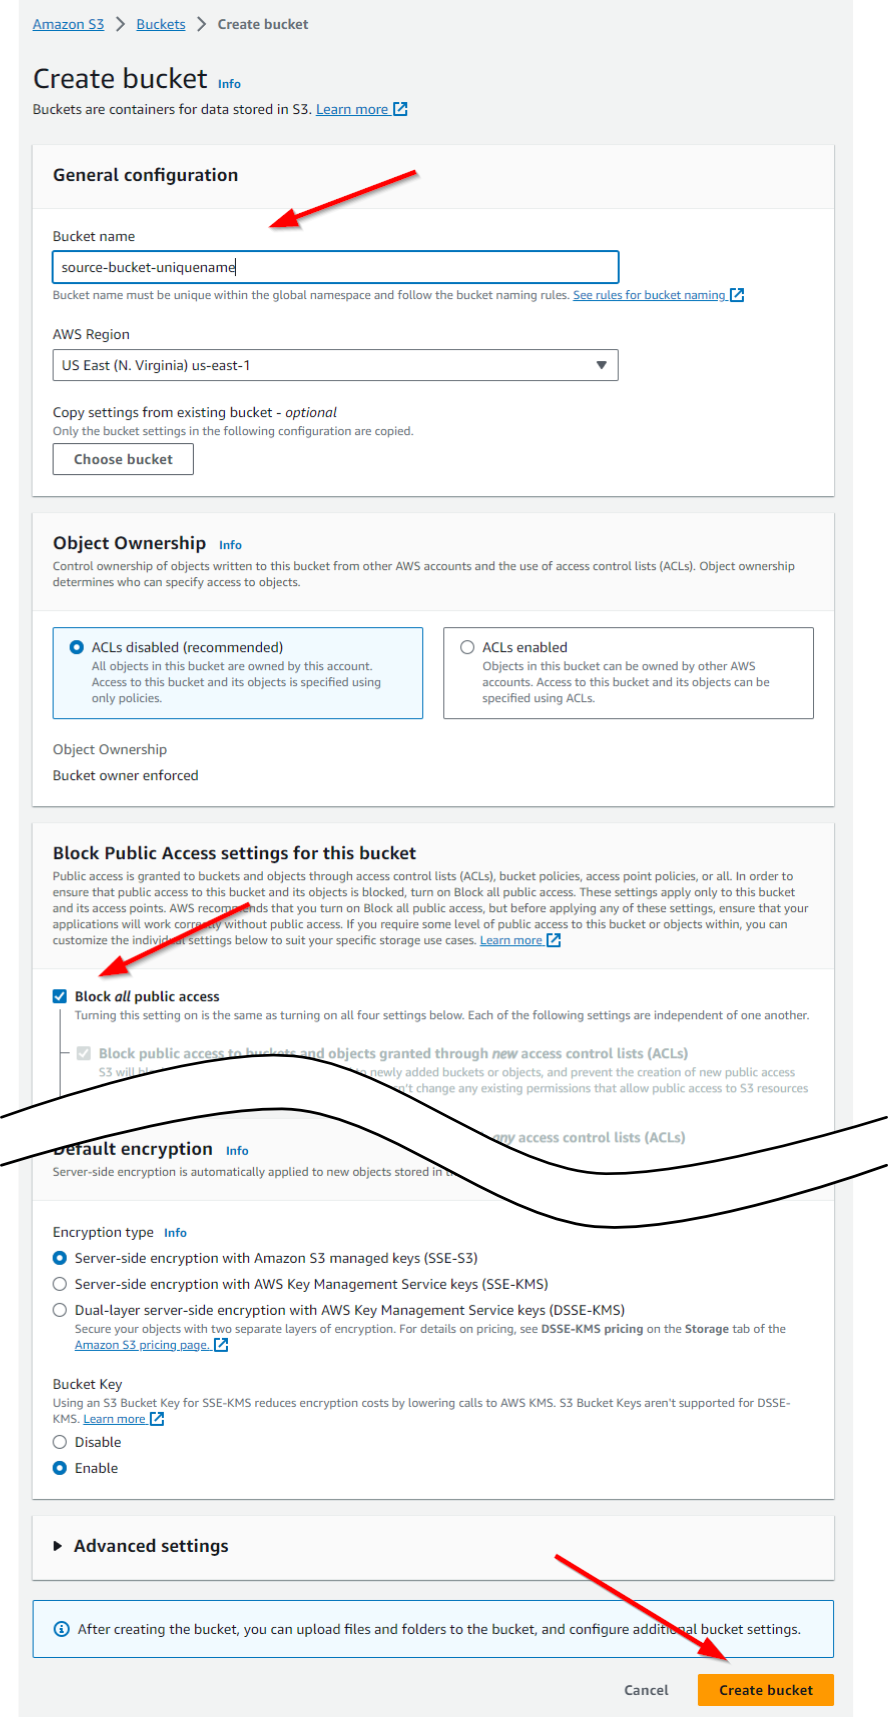
In the Create Bucket dialog
- Give the bucket a unique name (unique across all of AWS)
For the bucket name, a good choice might be companyname-projectname-bucket
Ensure Block all public access is selected
Select Create Bucket
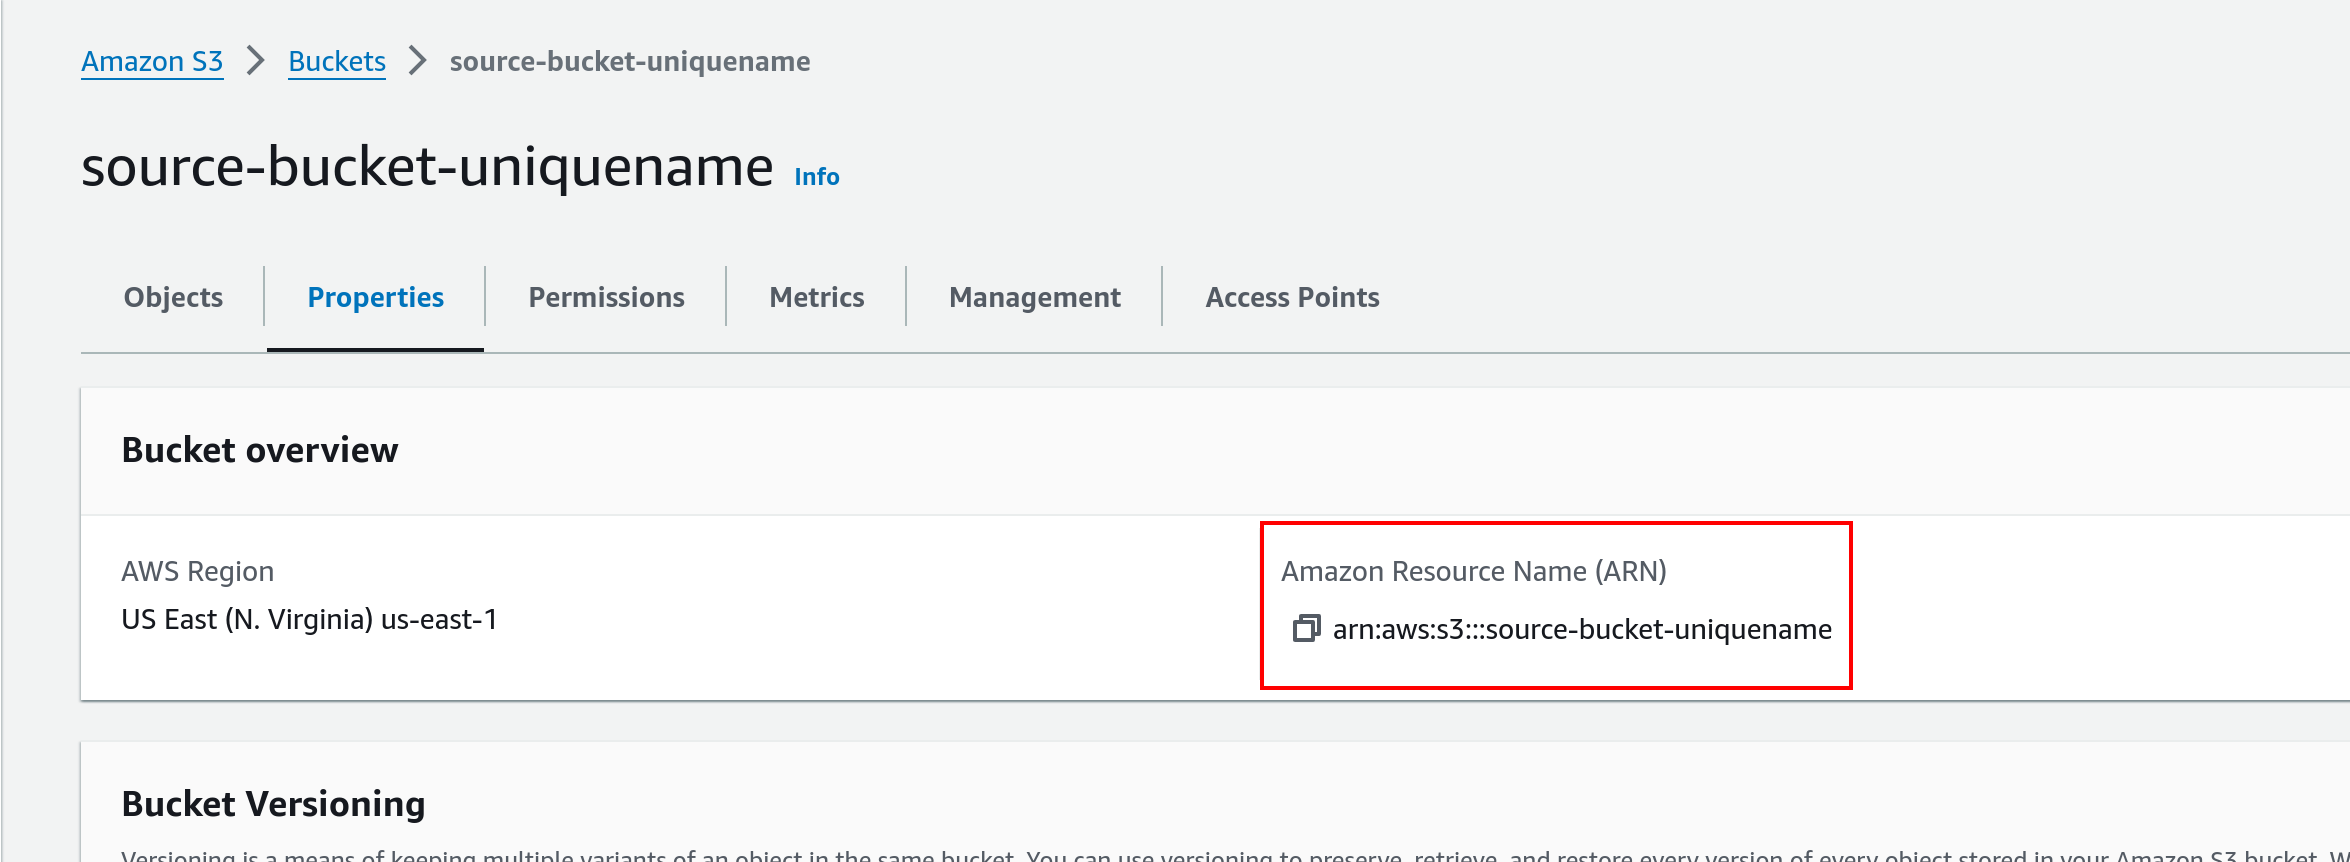
After the bucket is created, recover its ARN (“Amazon Resource Name”).
In the S3 dashboard, click on the newly-created bucket
Select the Properties tab
Save the ARN for later use
2. Create Policy
We only need a single policy.
Go to the IAM dashboard (not the IAM Identity Center).
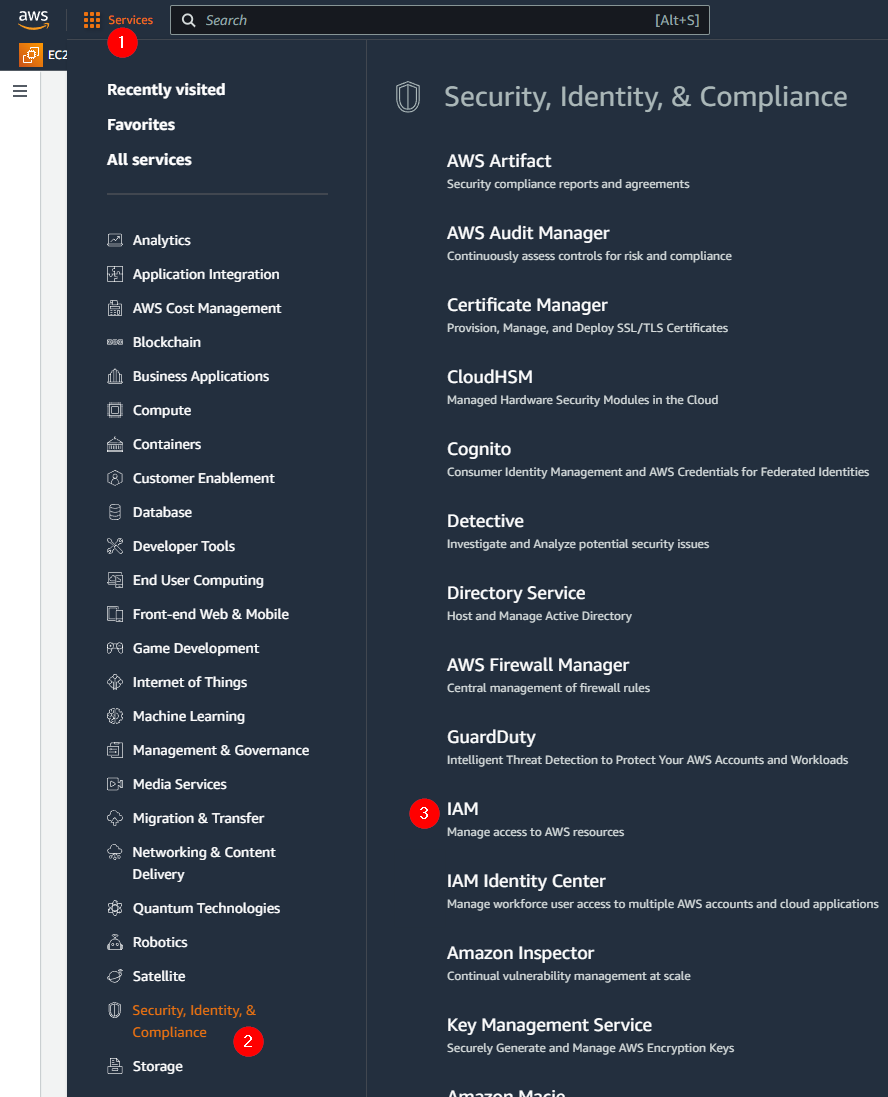
Select the Policies submenu.

Select Create Policy.

Select the JSON edit mode and paste the following in the editor area.
 1{
 2    "Version": "2012-10-17",
 3    "Statement": [
 4        {
 5            "Effect": "Allow",
 6            "Action": [
 7                    "s3:GetObject",
 8                    "s3:PutObject"
 9                ],
10            "Resource": [
11                "arn:aws:s3:::companyname-projectname-bucket/*"
12            ]
13        }
14    ]
15}
where the Resource key should be adjusted to match your own source bucket ARN from the previous step.
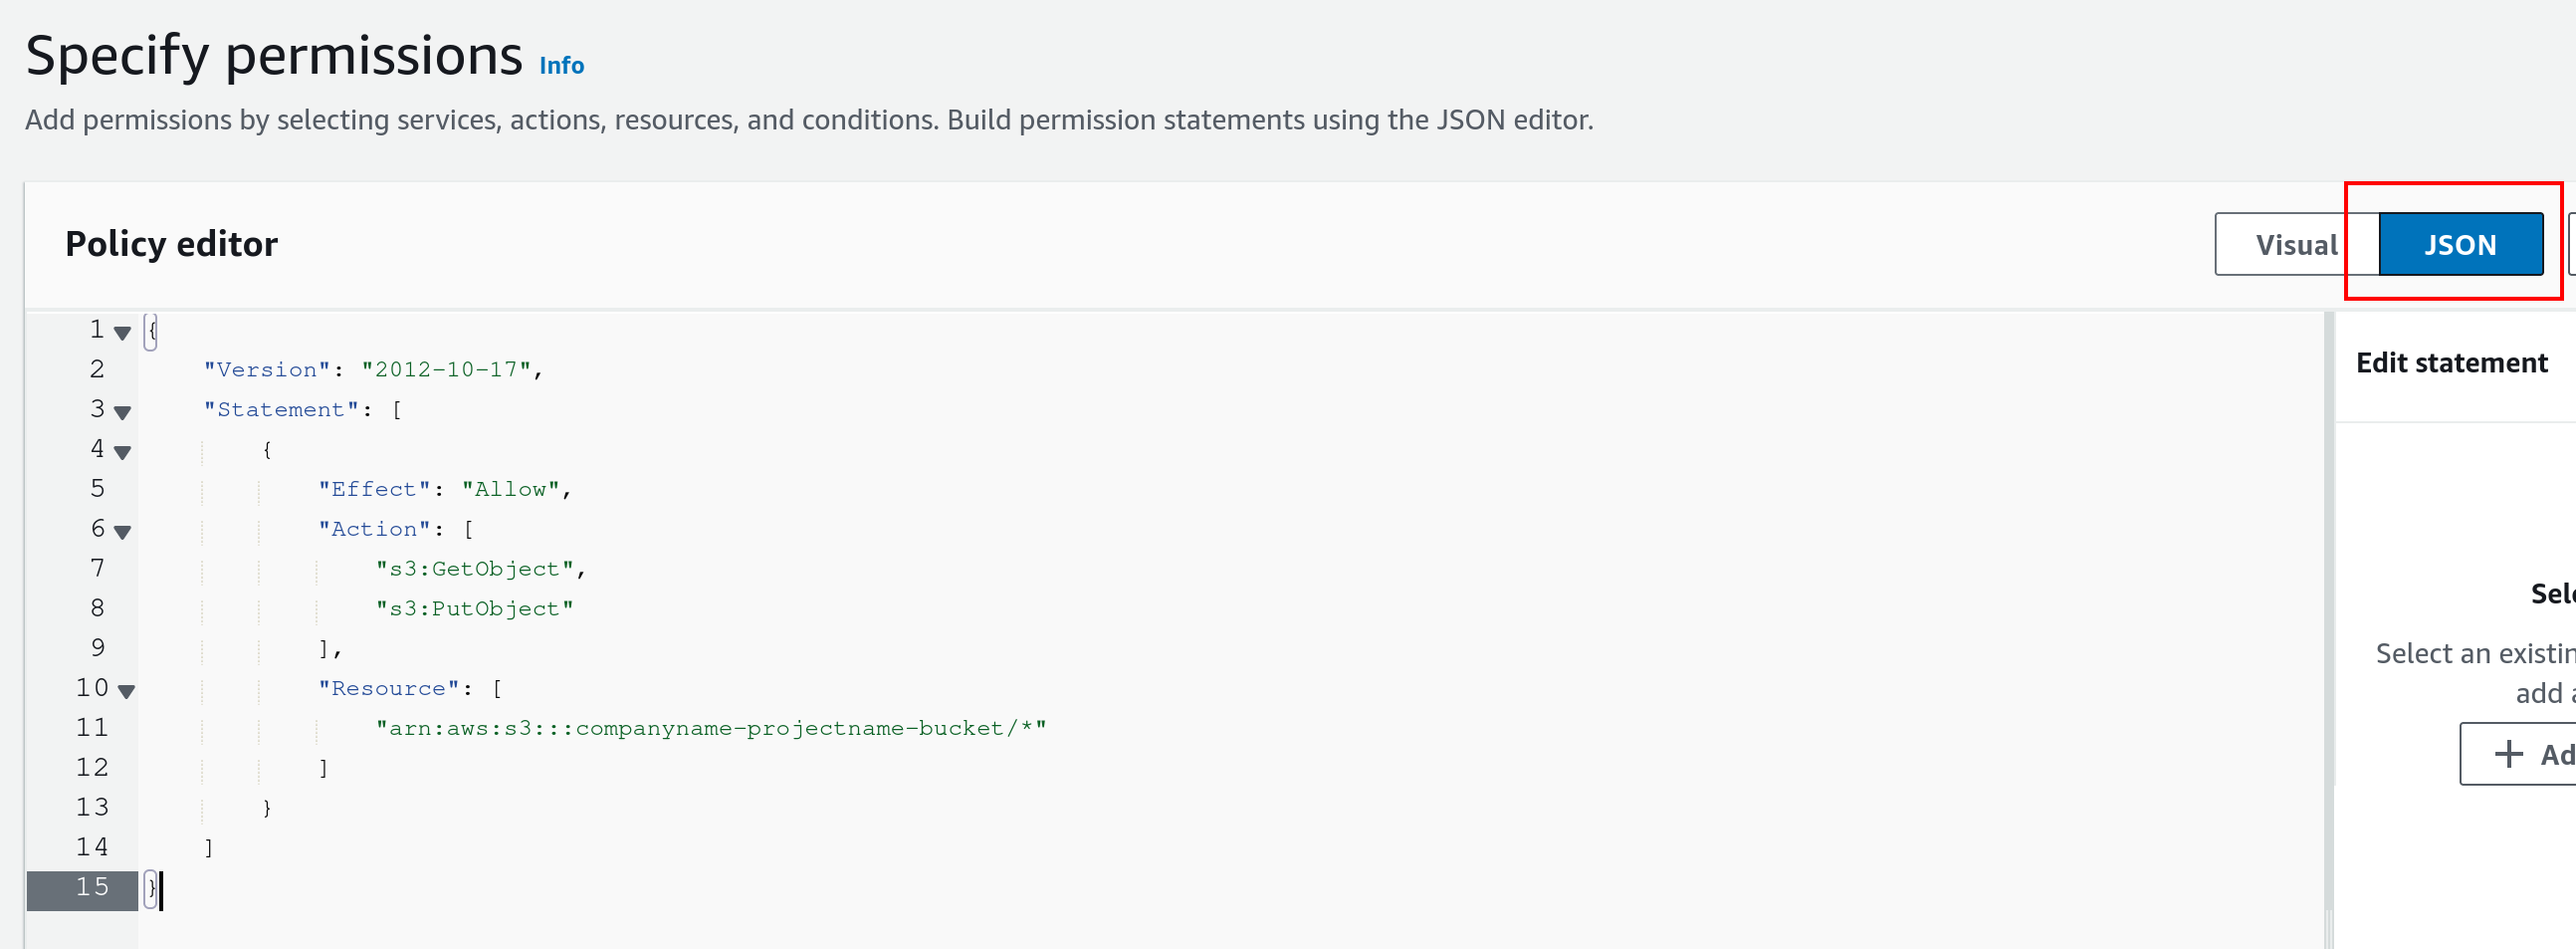
Click Next
In the following “Review and Create Policy” dialog, enter a policy name, eg. myReadAndWritePolicy and click Create.
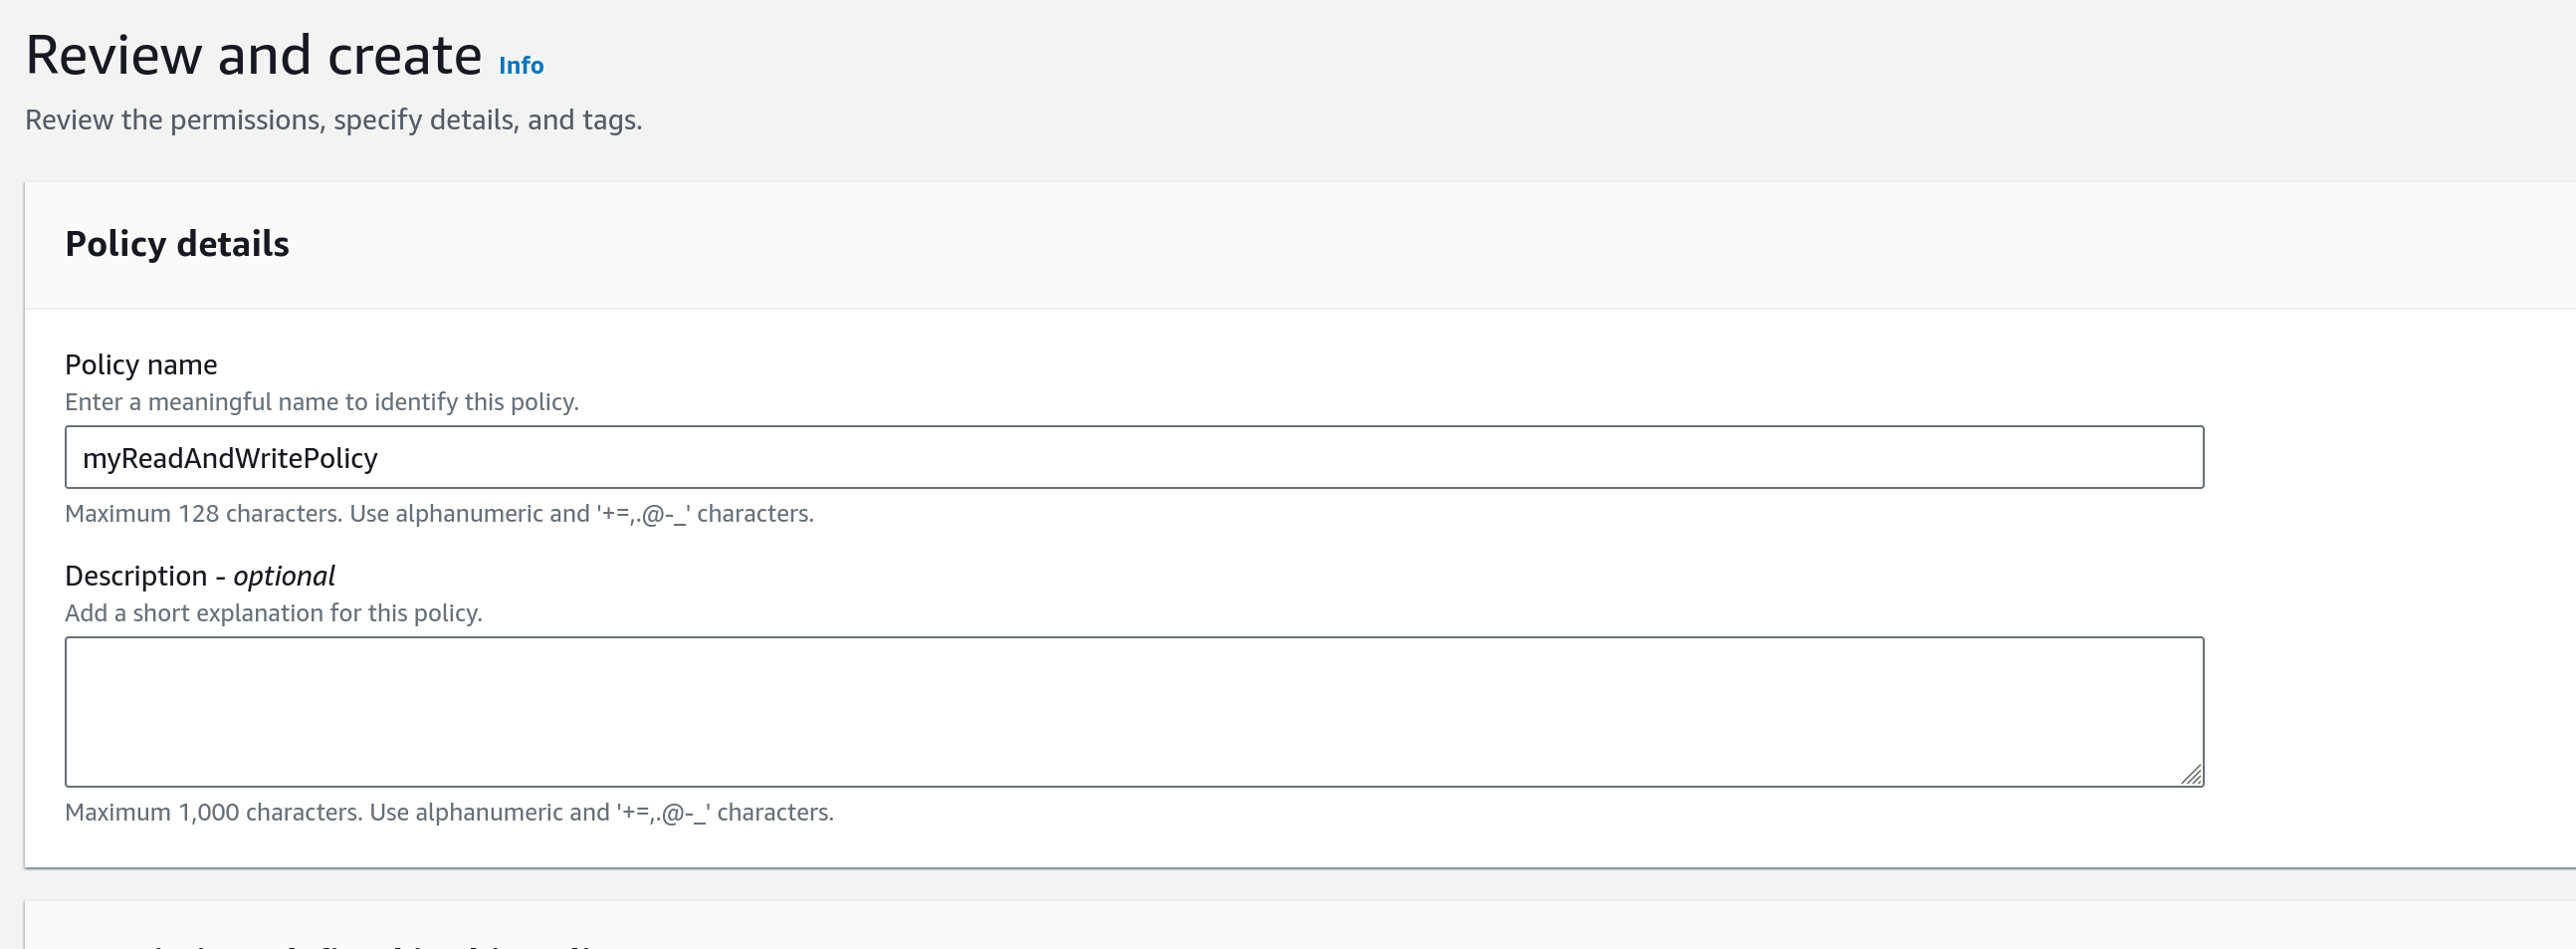
3. Create User
We only need a single user.
Back at the IAM dashboard, select the Users submenu.
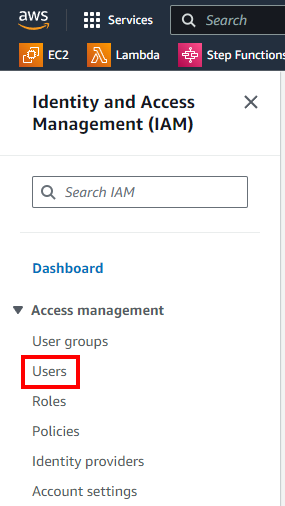
Select Create User.
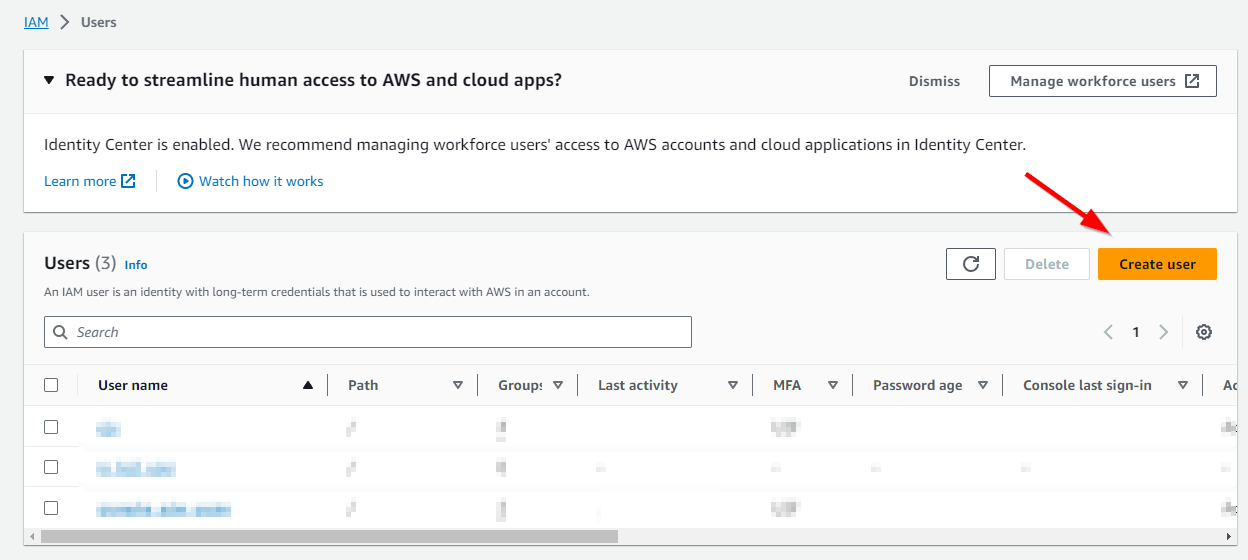
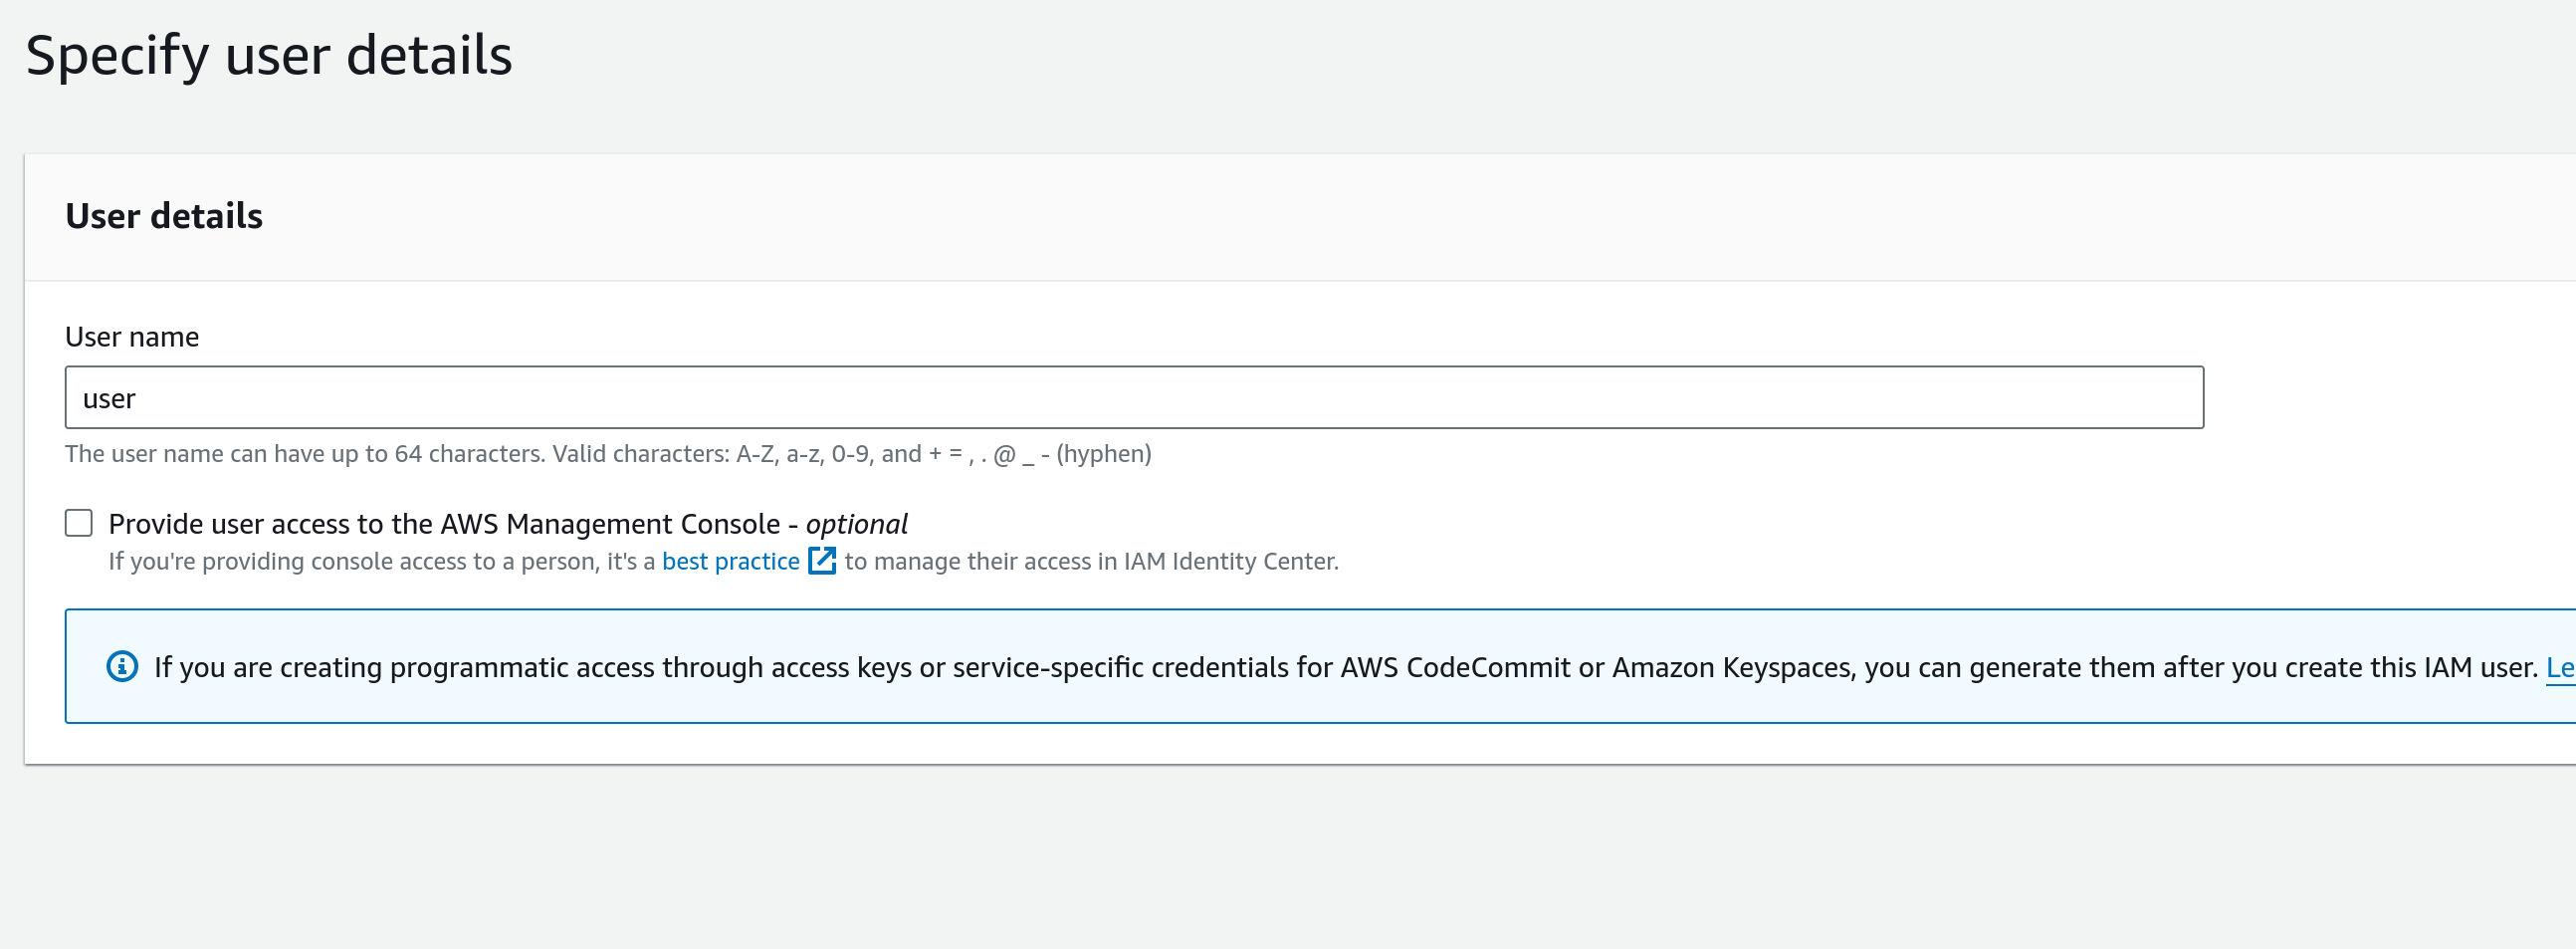
Pick a name for the user then click Next.
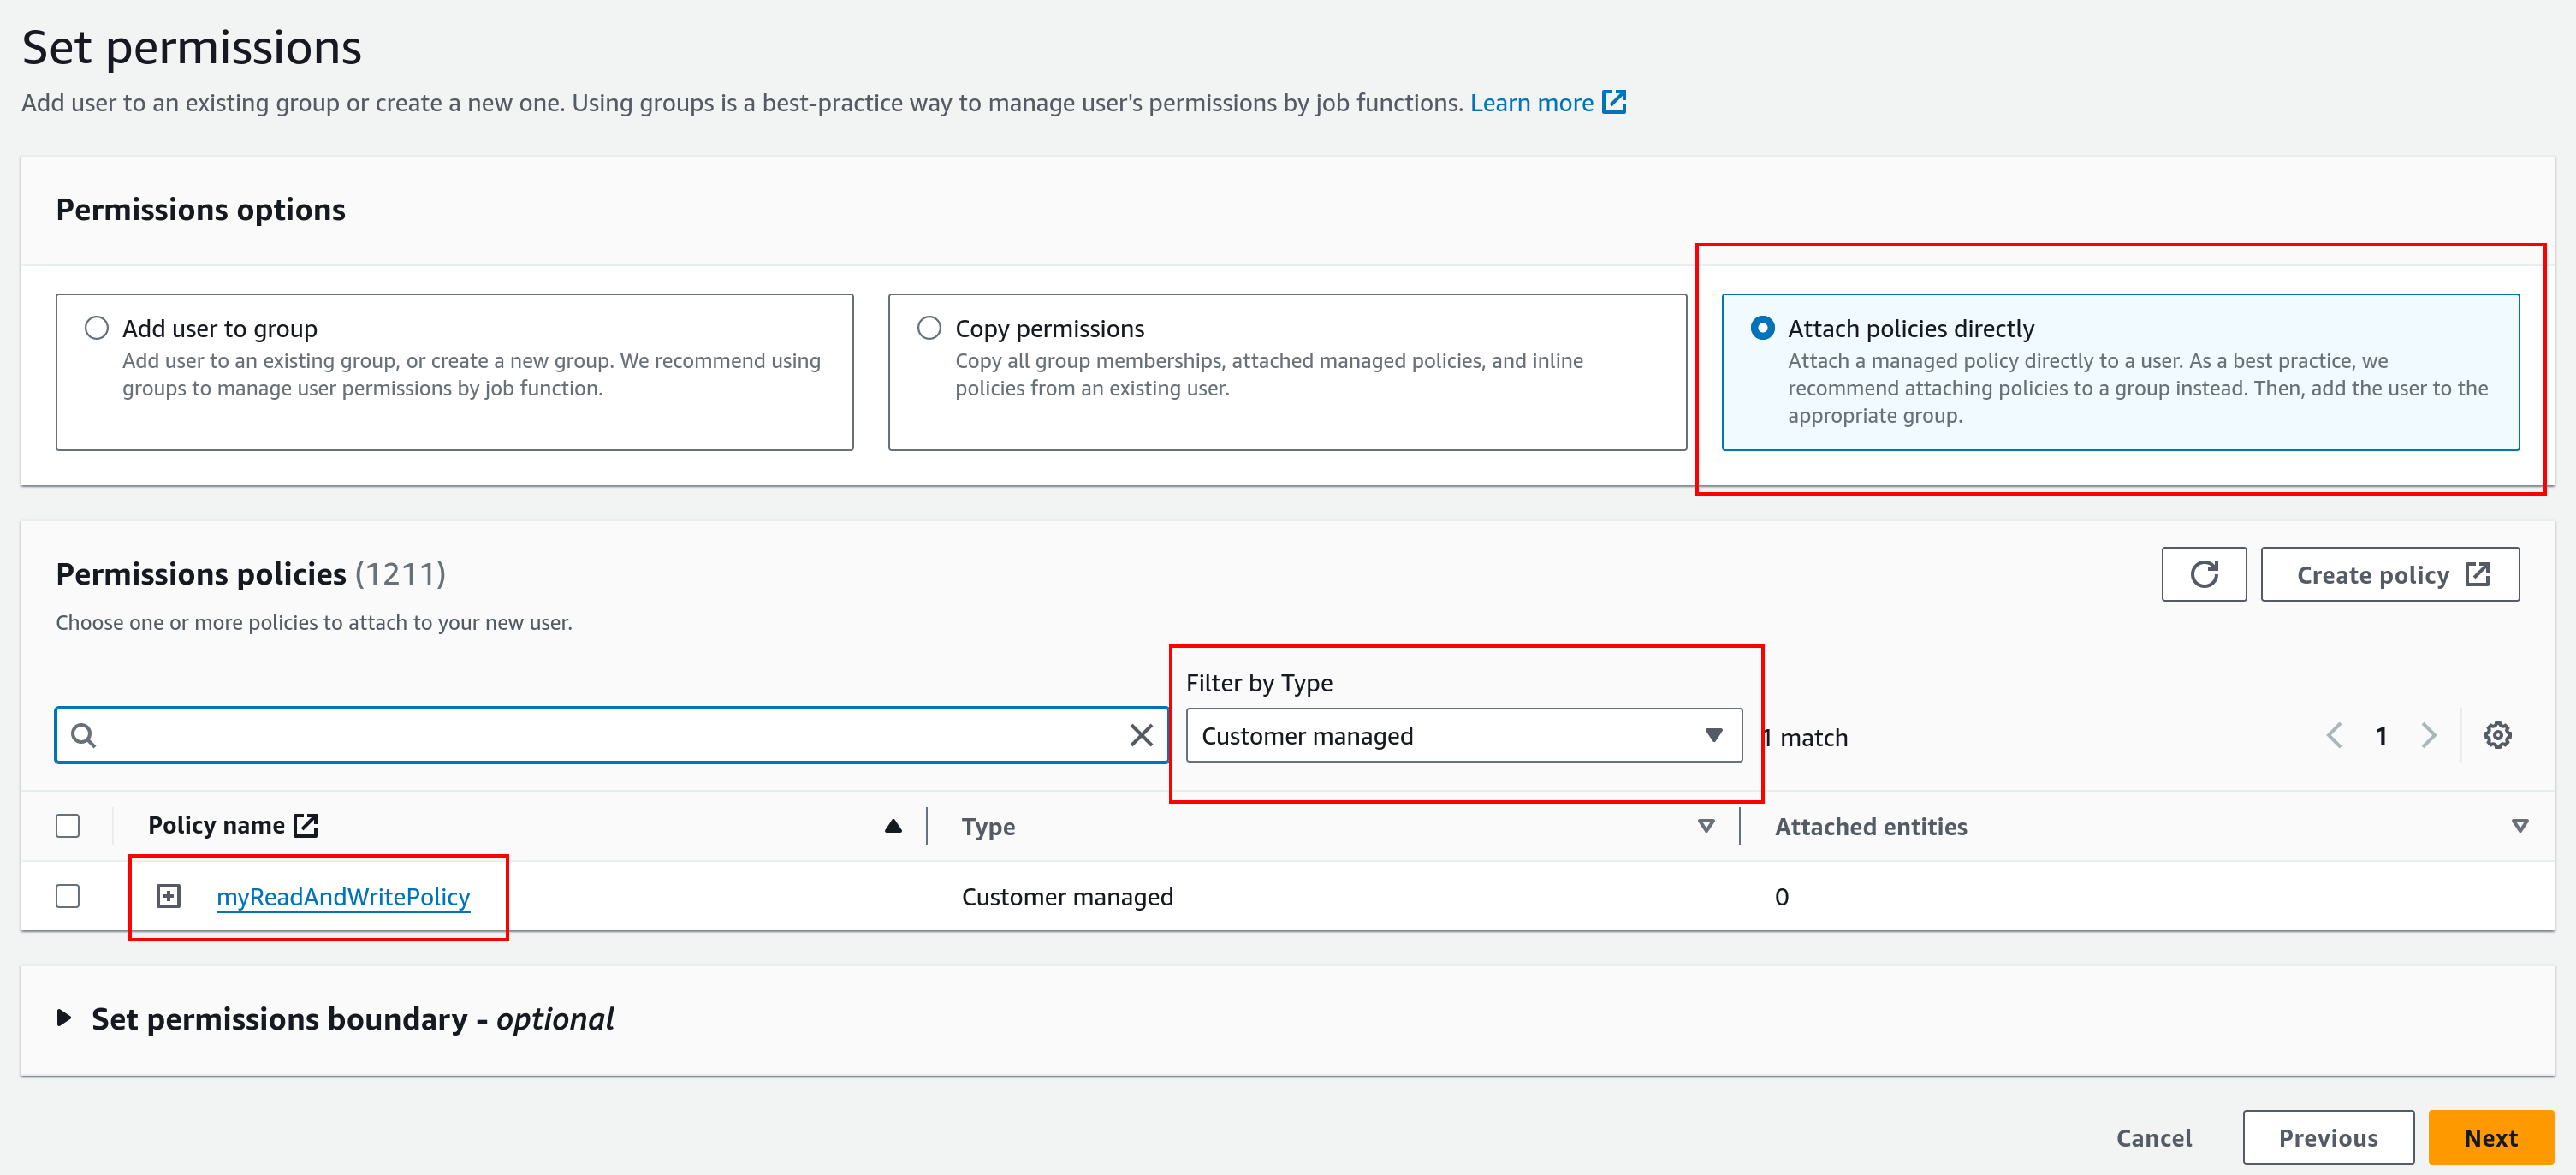
Select Attach policies directly.
Note
You may want to Filter by Type: “Customer Managed” to help locate the policies we previously created.
Select the previously-created policy only and click Next.
On the following page, you can finally click Create User.
4. Generating Credentials
Now we generate the crendetials required for the TitanQ service to access the bucket.
Starting at the IAM > Users dashboard, select the previously created user.
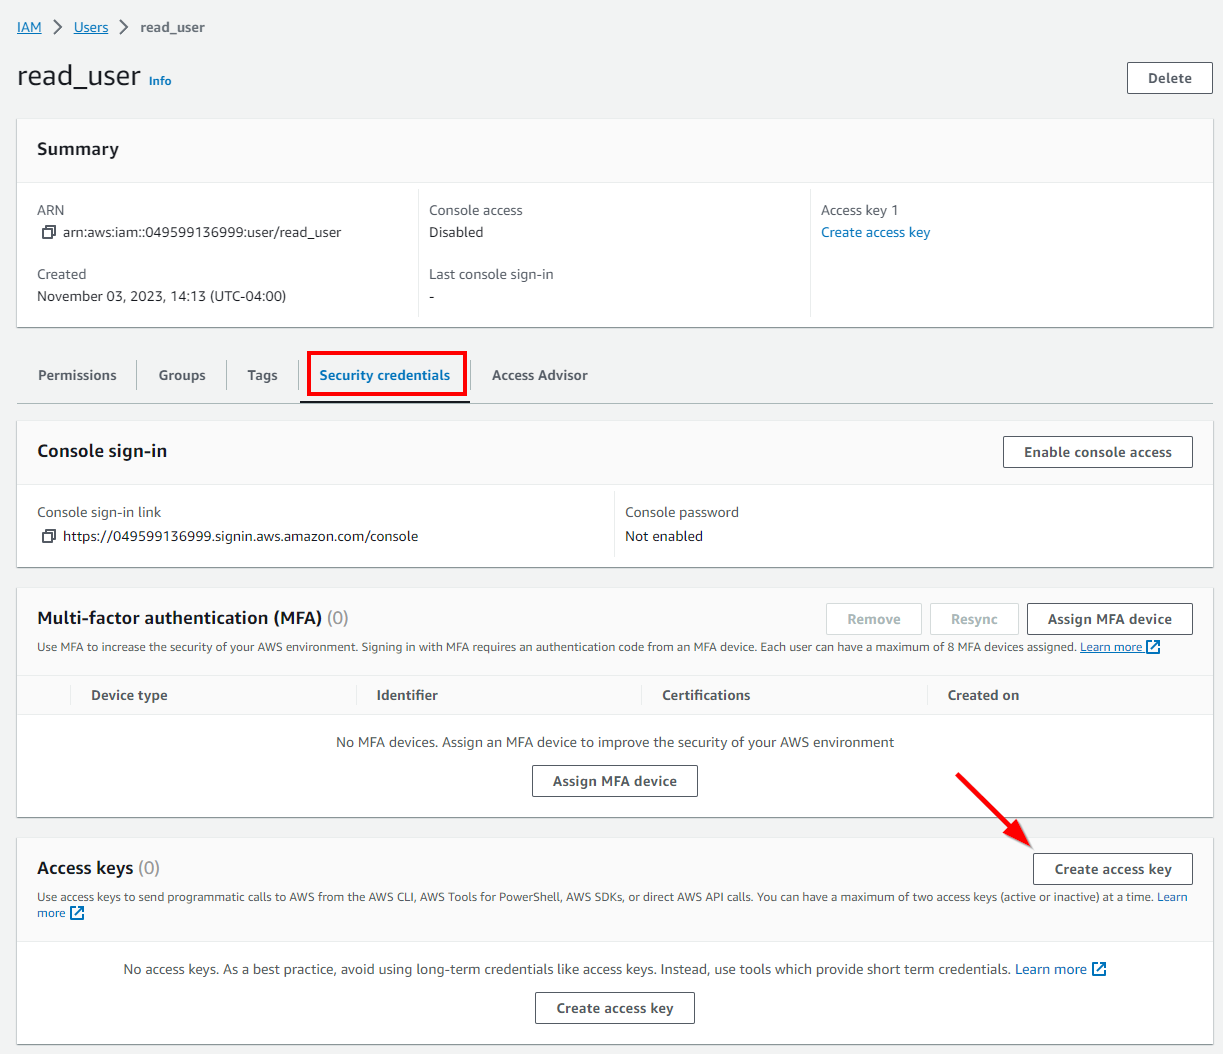
In the user’s info panel, navigate to the Security credentials tab and select Create access key.
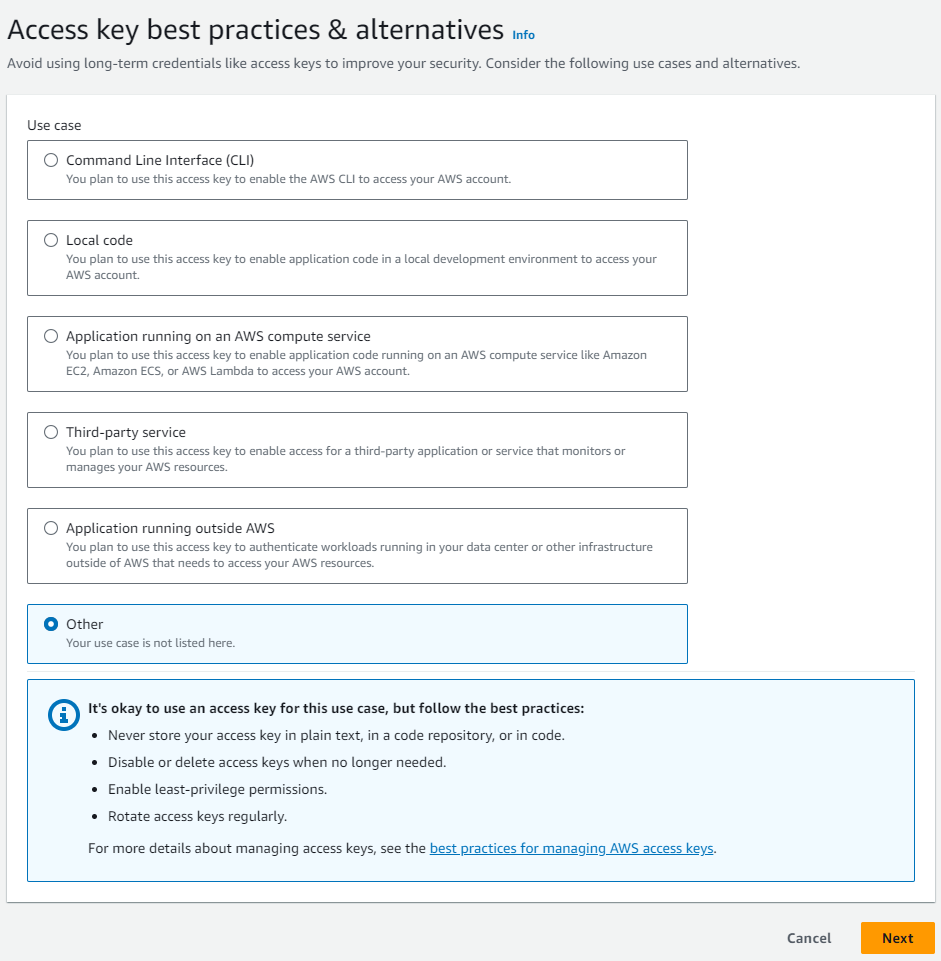
In the Access key best practices & alternative dialog, pick Other, then Next.
In the following dialog, you can optionally add a Description. Click Create Access Key.
Finally, in the Retrieve Access Key Dialog, copy both the Access Key ID **and **Secret Access Key for later use.
Warning
This will be the one and only opportunity to retrieve the Secret Access Key.
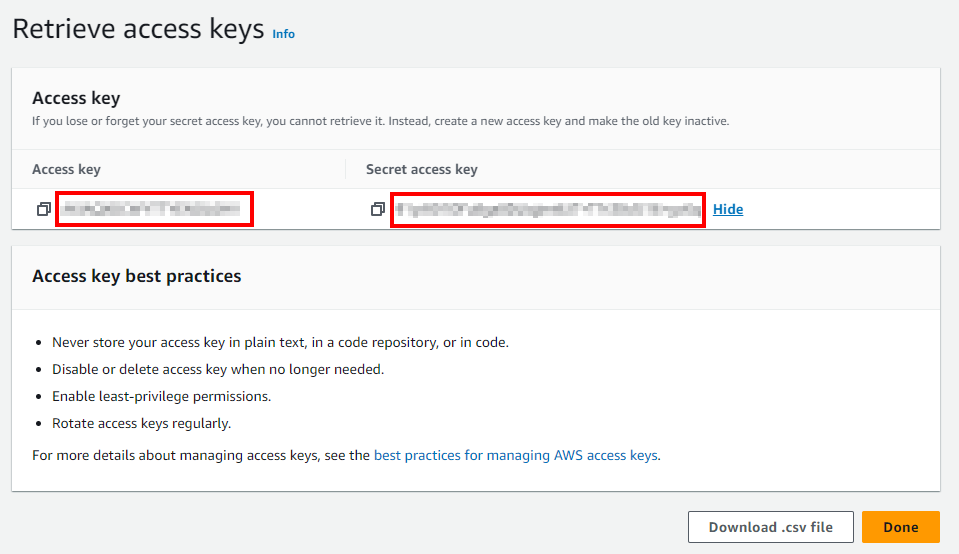
Click Done.
5. Putting it all together
 1import numpy as np
 2from titanq import Model, Vtype, Target, S3Storage
 3
 4TITANQ_API_KEY="<insert your TitanQ API key here>"
 5
 6AWS_BUCKET_NAME="<insert AWS bucket name here>"
 7AWS_ACCESS_KEY="<insert AWS bucket access key here>"
 8AWS_SECRET_ACCESS_KEY="<insert AWS secret access key here>"
 9
10# Problem construction
11edges = {0:[4,5,6,7], 1:[4,5,6,7], 2:[4,5,6,7], 3:[4,5,6,7], 4:[0,1,2,3], 5:[0,1,2,3], 6:[0,1,2,3], 7:[0,1,2,3]}
12size = len(edges)
13
14# construct the weight matrix from the edges list
15weights = np.zeros((size, size), dtype=np.float32)
16for root, connections in edges.items():
17    for c in connections:
18        weights[root][c] = 1
19
20# construct the bias vector (Uniform weighting across all nodes)
21bias = np.asarray([0]*size, dtype=np.float32)
22
23# TitanQ SDK
24model = Model(
25    api_key=TITANQ_API_KEY,
26    storage_client=S3Storage(
27        bucket_name=AWS_BUCKET_NAME,
28        access_key=AWS_ACCESS_KEY,
29        secret_key=AWS_SECRET_ACCESS_KEY
30    )
31)
32model.add_variable_vector('x', size, Vtype.BINARY)
33model.set_objective_matrices(weights, bias, Target.MINIMIZE)
34response = model.optimize(timeout_in_secs=1, coupling_mult=0.75, num_engines=2)
35
36print("-" * 15, "+", "-" * 26, sep="")
37print("Ising energy   | Result vector")
38print("-" * 15, "+", "-" * 26, sep="")
39for ising_energy, result_vector in response.result_items():
40    print(f"{ising_energy: <14f} | {result_vector}")